Wednesday, July 31, 2013

Technique Tuesday: Tent Card Tutorial

 
This tutorial is a little late, but my son is home with me this week so it is hard to find time to get in my craft room.  That being the case, I wanted to make something fun and also easy.  These tent cards are perfect because they are quick to put together and offer so many possibilities.

A tent card is a card that stands on its own.  You can use any size card base.  For this first card the base is 4-1/4" x 11".  You then add a piece of cardstock that is 4-1/4" x 4", scored every inch to make the bottom.  The mountain fold should be in the middle so the two end can adhere to your card base.  There is an excellent tutorial on this card at SplitcoastStampers.

After I made a "Day Card" I thought I should make a "Night Card," as well.  For this card I made the card base 4-1/4" x 8-1/2" so I would end up with a square card.  The bottom piece is still 4-1/4" wide to fit the base, but the length was extended to allow it to stick up into the window.  The pumpkin is attached to the center to add more depth to the scene.

You can see here that the moon and sentiment backing were done with glimmer paper.  To add even more sparkle the stars were added with Silver Dazzling Details.  It is hard to see in the photos, but the different levels of this card give it a real Wow-factor.

Working on these cards, I thought of many other scenes I would like to make with a tent card.  What will you make?


Supplies for "Day Card"
Papers: Whisper White (#100730), Crumb Cake (#120953), Tempting Turquoise (#102067), Daffodil Delight (#119683), Brights DSP (#130134)
Inks: Tempting Turquoise (#126952), Smoky Slate (#131179)
Stamps: Hello Lovely (#130243)
Other Supplies: Big Shot (#113439), Oval Framelits (#129381), Square Lattice Folder (#119976), Wood Grain Folder (#127821), Cupcake Builder Punch (#121807)

Supplies for "Night Card"
Papers: Very Vanilla (#101650),Midnight Muse (#126843), Pumpkin Pie (#105117), Gumball Green (#126840), Glimmer Paper (#124005)
Inks:Pumpkin Pie (#126945), Crumb Cake (#126975)
Stamps: Teeny Tiny Wishes (#128748))
Other Supplies: Big Shot (#113439), Circle Framelits (#130911), Wood Grain Folder (#127821), 1" Circle Punch (#119868), 1/2" Circle Punch (#119869), Word Window Punch (#119857), Modern Label Punch (#119849), Silver Sparkle Dazzling Details (#127845)

PAPER PUMPKIN ON SALE!


From now until Aug. 31, you can sign up for My Paper Pumpkin monthly craft kits for just $10 a month for the first 2 months.  After 2 months the price will return to $19.95 a month (with the option to cancel your subscription).

To start your Paper Pumpkin subscription, click here and then click "Subscribe"  To get 2 months for $10 each, please be sure to use the Promo Code:  PUMPKINDEAL. 

Monday, July 29, 2013

Unscripted Sketches #27: Birthday Girl Scrapbook Page

 
Today is a project from MDS that was inspired by a sketch challenge.  It was also inspired by one of my favorite photos of my baby girl on her second birthday.

Unscripted Sketches is doing a Flashback Summer when they are choosing random sketches from the past.  The is Flashback Sketch #27.  You can use the sketch to make a card, scrapbook page, or anything else you like.

I decided to do a scrapbook page, using my photo as the main image panel.  Then I added three cupcakes for the embellishments.  To keep this page simple I used a number punch and a stamp sentiment to fill in some of the space.  I little bit of stitching on the corners and some rhinestones adds some texture and sparkle. 

What could you do with this sketch?


Supplies: MDS, Sweet Details DSP, Simple Stitched Corners, Celebrate Any Day Designer Kit, Cake and Ice Cream Stamp Brush Set, Patterned Occasions Stamp Brush Set, Timeless Type Junior Numbers Punches, Modern Label Punch, Rhinestones (many items were re-colored)

Try the NEW "Pick A Kit" Offer


New recruits get to pick one of four project kits for free in addition to their starter kit when they join Stampin' Up! July 15 through August 31, 2013.  The first three project kits are from the holiday catalog and the last option is from the annual catalog.

Option 1: Build a Banner Simply Created Kit AND Halloween Banner Simply Created Accessory Kit
               (Item #133507 AND #132698, a $29.90 Value)
Option 2: Build a Banner Simply Created Kit AND Christmas Banner Simply Created Accessory Kit
                (Item #133507 AND #132697, a $29.90 Value)
Option 3:  Thankful Tablescape Simply Created Kit
                (Item # 133463, a $19.95 Value)
Option 4:  Tag a Bag Bundle AND Tag a Box Bundle
                (Item # 131371 AND #131372, a $22.45 Value)

Just visit my website to "Join the Fun" and get started today!

Wednesday, July 24, 2013

Stampin' Up! Convention 2013 Make and Takes

This year we had several Make and Takes at Convention.  I was so busy trying to do everything else that I did not get around to making them while I was in Salt Lake City.  So, now that I am home I thought I would put them together.

The first project is a bag of simple notecards.  All these cards have one stamp and a rhinestone to make them all a matching set.

Sometimes a Wow! can come from something as simple as stamping off.  Simply ink your stamp once and then stamp it several times so that each image gets lighter and lighter.

Turning a stamp different directions can also make an interesting focal point for a card.

As can repeating an image in multiple colors.  These images have also been repeated on the envelopes to make a matching set.

The final card in the collection is a simple sentiment that has been stepped up with a little sparkle.

Another project that was offered used the Gorgeous Grunge stamp set, which I am very excited to start playing with.  I love the background options that this stamp set offers.  Several of the stamps were used here to make the "dirty" background.

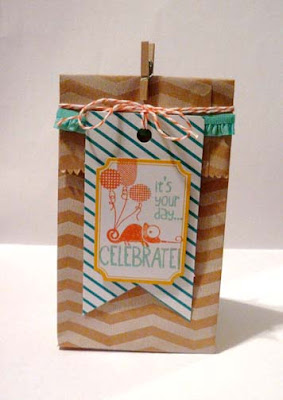
The final project is turning the Tag A Bag Gift Bag into a gusseted bag.  By scoring each side at 1" and the bottom at 1-1/4" you can turn a flat bag into one with some width.  The Tag A Bag Accessories Kit is perfect for decorating it.

All of these projects were easy to assemble, but still offered a real wow factor.  Making these goodies did make me happy.  Which one do you like the best?


Want to join me next year at Convention 2014:
Try the NEW "Pick A Kit" Offer


New recruits get to pick one of four project kits for free in addition to their starter kit when they join Stampin' Up! July 15 through August 31, 2013.  The first three project kits are from the holiday catalog and the last option is from the annual catalog.

Option 1: Build a Banner Simply Created Kit AND Halloween Banner Simply Created Accessory Kit
               (Item #133507 AND #132698, a $29.90 Value)
Option 2: Build a Banner Simply Created Kit AND Christmas Banner Simply Created Accessory Kit
                (Item #133507 AND #132697, a $29.90 Value)
Option 3:  Thankful Tablescape Simply Created Kit
                (Item # 133463, a $19.95 Value)
Option 4:  Tag a Bag Bundle AND Tag a Box Bundle
                (Item # 131371 AND #131372, a $22.45 Value)

Just visit my website to "Join the Fun" and get started today!

CASology 54: Golden Congratulations Card

Today I wanted to keep it Clean and Simple (CAS) and make something that I might use at an upcoming craft fair.  I have been asked to make some stationary projects and I think this one will be perfect.

The card was inspired by the CASology challenge (#54) which was to use Gold on your project.

For the gold on this project I decided to use some gold embossing powder.  I did both the design and the sentiment to make it shine.  I tried doing some gold embossing on the Crumb Cake, but it did not show up very well.  I love the way it pops off the Chocolate Chip cardstock.

Using a repeating pattern and a monochromatic color scheme keeps this card CAS.  Adding some embossing and ribbon, as well as layering the base gives the card added interest.  What will you make with gold?


Papers: Chocolate Chip (#102128), Crumb Cake (#120953), Very Vanilla (#101650)
Inks: VersaMark (#102283)
Stamps: Sweet Essentials (#126457), Hello, Lovely (#130243)
Other Supplies: Gold Stampin' Emboss Powder (#103129), Crumb Cake Seam Binding (#122332), 1-1/4" Scallop Circle Punch (#127811)

Hello, Lovely (#130243)

NEW "Pick A Kit" Offer

New recruits get to pick one of four project kits for free in addition to their starter kit when they join Stampin' Up! July 15 through August 31, 2013.  The first three project kits are from the holiday catalog and the last option is from the annual catalog.

Option 1: Build a Banner Simply Created Kit AND Halloween Banner Simply Created Accessory Kit
               (Item #133507 AND #132698, a $29.90 Value)
Option 2: Build a Banner Simply Created Kit AND Christmas Banner Simply Created Accessory Kit
                (Item #133507 AND #132697, a $29.90 Value)
Option 3:  Thankful Tablescape Simply Created Kit
                (Item # 133463, a $19.95 Value)
Option 4:  Tag a Bag Bundle AND Tag a Box Bundle
                (Item # 131371 AND #131372, a $22.45 Value)

Just visit my website to "Join the Fun" and get started today!


Tuesday, July 23, 2013

NEW MDS Downloads!

Today is Tuesday.... and that means NEW MDS Downloads!  There are several great new stamp sets and some of Stampin' Up!'s most popular DSP.


Just a reminder - you can get a FREE 30-day trial of MDS, which includes:

* Full access to the software at NO COST for 30 days
* Full access to design tools to create cards, photobooks, calendars, and more
* Full access to a sample of exclusive artwork
* The chance to buy additional downloads that you can keep after your trial expires
* Ability to order your projects from our professional print services

Plus, to use the software more than 30 days, you can buy the full MDS software (#130646).

 
 The first new download is the Hello Lovely Stamp Brush Set.  This is a great set with wonderful designs and sentiments.

The Postcard Stamp Brush is a must have in MDS.  You can make beautiful postcards to send anytime.
The World Map is a wonderful background stamp that would be perfect for the post cards you will be making with the previous stamp.  It would also work great for travel pages and cards.
 
One of the hottest Designer Series Papers right now is the Soho Subway paper and now you can get it digitally.  The colors are soft and interesting and the designs have a contemporary feel that would fit so many projects.
Another new download is this Rise and Shine Pocket Card set.  This set has 8 templates, 40 stamp brushes, and 32 embellishments.  This grouping is perfect for documenting your everyday life.


The final download for today is the Party Premiere Ensemble.  This set features a double sided postcard invitation, 14 page décor template, 58 stamp brush set, 6 Designer Series Papers, 48 embellishments, and one punch. That is a lot of goodies!  I want to have a movie party just to use this set.

Remember, you can try MDS free for 30 days, and then when you fall in love with it (like I have) you can purchase the software and keep going with all the amazing project options that MDS provides.


PAPER PUMPKIN ON SALE!

From now until Aug. 31, you can sign up for My Paper Pumpkin monthly craft kits for just $10 a month for the first 2 months.  After 2 months the price will return to $19.95 a month (with the option to cancel your subscription).

To start your Paper Pumpkin subscription, click here and then click "Subscribe"  To get 2 months for $10 each, please be sure to use the Promo Code:  PUMPKINDEAL. 

Friday, July 19, 2013

Convention 2013 Swaps

Stampin' Up! Convention 2013 has finally arrived.  The open song was sung by Ryan from The Voice, and then Shelli and her entire family came out to welcome us.  Everything looks stunning and I am so excited to start the first full day here in Salt Lake City.

I posted a few days ago about a 3D Swap that I was going to be doing here at Convention (see post here).  I thought I would also show you some of the goodies I got in return.  This is a cute, bright drink powder holder (like the Crystal Lite packets) that you can hang on a water bottle. It was made by the swap organizer Erin Cook from North Carolina. I love all the colors!

This cute bird pin was made with a metal plate and pin back purchased from a craft store and then embellished with our "For the Birds" stamp set.  This pin was created by Alyce Brown from Illinois and is a sweet gift idea. 

This bright and cheerful ornament was created by Denise Knowles from North Carolina.  I love that you can see both sides and the DSP and the super cute embellishments that she used.

Besides wonderful friends, great swaps, and lots of free goodies, Convention this year is about making a difference in many ways.  Last night I helped put together birthday kits for a local chidren's hospital.  It was lots of fun.  Stampin' Up! also set a Guinness Book World Record for the most greeting cards sent simultaneously from a single location (the record is now 2,984 if you are wondering).

Well, I am off to another fun day of classes and projects.  More to come!


Wednesday, July 17, 2013

Stampin' Up! Convention 2013 Swaps

Well, it is finally here!  Stampin' Up! Convention starts tomorrow and I am sooooooo excited.  Besides the two organized swaps that I signed up for, I am also making some general swaps.  When I am deciding what to do for general swaps I try to think about what people will want.  Many demos use these swaps to show new stamps, new tools, or fun techniques.

I focused on the Happy Day stamp set, which has the medallion, the sentiment, and a large stamp that I used a small part of to make the red circle.  I use both dry embossing (background) and hear embossing (medallion).  I also featured a large circle and one banner in the I Am Me DSP.

Then, because one is never enough for me, I decided to make another swap that focused more on one stamp set.  The Tape It stamp set was one of my favorites the first time I looked through the new catalog.  I love being able to stamp and create that Washi Tape feeling.  Here, I am using five of the eight tape designs in this stamp set.  There are just so many things you can do with these designs.  This sentiment also comes from the Happy Day stamp set.

I can not wait to see all the great swaps that everyone else will make, too.  I will be sure to post pictures soon!


Buy 3, Get 1 FREE!
Collect a paper stash for every mood and project.  From now until July 31st, buy three packs of your favorite Designer Series Papers and get one FREE! No limits. Order six? You'll get two for free. Nine? You'll get three for free.

The Fine Print:
  • These items don't qualify for the offer:
    • Designer Series Paper Stacks
    • Specialty Designer Series Paper
    • Designer Series Paper from the holiday catalog preorder
    • Designer Series Paper ordered through hostess benefits
  • To get your free DSP, enter it in your order separately from the three packs you're paying for. For example, if you want four packs of the same type of paper, put in the three you're paying for and enter the fourth as a separate item.
  • Check out our Designer Series Papers in the annual catalog pages 151, 153, and 154.

Tuesday, July 16, 2013

Technique Tuesday: Altered Clear Mount Case

I had hoped to get this posted earlier today, but Blogger did not seem to want to cooperate.  So, it is a little late... but still Tuesday.

Today's technique is an Altered Clear Mount Case.  I am using this for a 3D Swap at the Stampin' Up! Convention in just a couple of days.  I think it will be perfect, since we are swapping right before it starts and the girls will all need something to write notes on in all the great classes we will be taking.

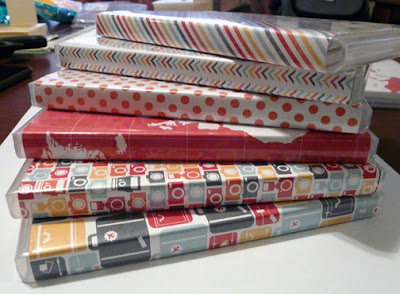
The main decoration is all cut from one piece of DSP.  You can see here that the largest piece is for the cover (10 5/8 x 7).  The pocket is 3 1/2 x 5 1/2.  I then scored it on three sides at 1/4" and 1/2" to form the folds which give the pocket some depth.  Then I cut the Notepad Top down to 5 inches and wrapped it around the notepad (which I had cut to size at my local office store).  The extras are great for creating additional elements, like an altered pen.

I made all the cases the same way, but used different sheets of DSP for each one.  The new I Am Me DSP is so colorful and fun.  And the camera and suitcase images were perfect for Convention.  I also added the Convention theme on the inside.

Since Convention is all about meeting other demos and making new friends, I could not pass up this sentiment for my cover.  Sitting around with a few thousand (yes, thousand) other demos just laughing and talking is the best part of Convention for me.  All of the colors came straight from the DSP.

Only one more day to get ready and then I am off to Salt Lake City.  I will have plenty of pictures and lots of great tips and tricks when I get back.  And of course, lots of notes in my cute, handy notebook case.


Papers: So Saffron (#105118), Pool Party (#122924), Whisper White (#100730), I Am Me DSP (#130138)
Inks: Calypso Coral (#126983), Basic Gray (#126981)
Stamps: Tape It (#130715), Feel Goods (#129684)
Other Supplies: Clear Mount Cases (#119105), Real Red Stitched Ribbon (#126875), Whisper White Baker's Twine (#124262), Pool Party Button (retired), Big Shot (#113439), Chevron Folder (#127749), MDS (#130910)


Buy 3, Get 1 FREE!
Collect a paper stash for every mood and project.  From now until July 31st, buy three packs of your favorite Designer Series Papers and get one FREE! No limits. Order six? You'll get two for free. Nine? You'll get three for free.

The Fine Print:
  • These items don't qualify for the offer:
    • Designer Series Paper Stacks
    • Specialty Designer Series Paper
    • Designer Series Paper from the holiday catalog preorder
    • Designer Series Paper ordered through hostess benefits
  • To get your free DSP, enter it in your order separately from the three packs you're paying for. For example, if you want four packs of the same type of paper, put in the three you're paying for and enter the fourth as a separate item.
  • Check out our Designer Series Papers in the annual catalog pages 151, 153, and 154.